
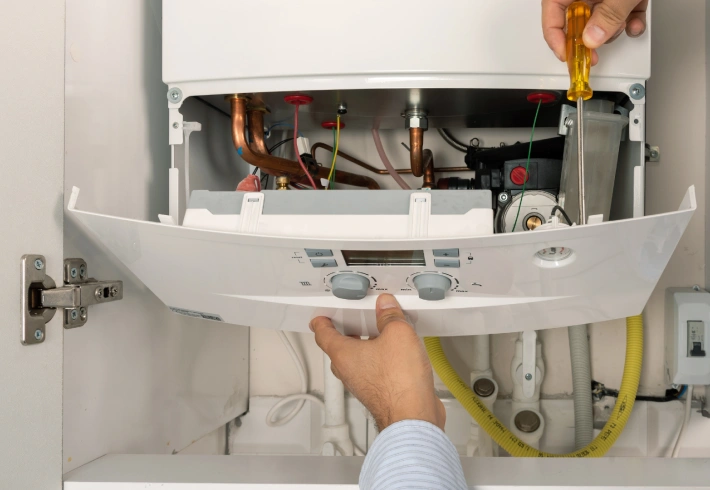

5 Essential Steps to Maximize System Performance
Simple Steps, Maximum Efficiency
Prepare Your System and Verify Safety Protocols
Before touching any component of your heating system, proper preparation prevents accidents and ensures effective maintenance. Start by turning off power to the furnace at both the thermostat and the circuit breaker. This dual shutoff protects you from electrical shock and prevents the system from cycling on unexpectedly during maintenance.
Gather the necessary tools and supplies before beginning work. You will need a screwdriver set (both flathead and Phillips), a flashlight or headlamp for visibility, a shop vacuum with attachments, replacement filters sized correctly for your unit, and clean microfiber cloths. For gas furnaces, have the manual accessible to reference the pilot light location and relighting procedures. Keep a notepad nearby to document serial numbers, model information, and any unusual observations during inspection.
In Buda, TX, furnaces accumulate significant dust and debris during the warmer months when they sit unused. Central Texas homes experience dry conditions that accelerate particulate buildup inside HVAC systems. Before opening the furnace cabinet, clear the surrounding area of storage items, cleaning supplies, or flammable materials. Ensure adequate lighting in your utility room or garage where the unit is installed. Many homeowners in the region store seasonal items near their furnaces, creating both fire hazards and airflow obstructions.
Inspect the exterior cabinet for damage, rust, or gaps where conditioned air might escape. Check that the access panel fits securely and that all fasteners are present. Look for evidence of moisture, which could indicate a condensate drain problem or a more serious issue requiring professional attention. If you notice corrosion, unusual odors, or hear strange sounds when the system runs, contact a licensed technician before proceeding with DIY maintenance. Gomez Heating and Air Conditioning provides comprehensive system inspections for Buda homeowners who prefer professional diagnostics before attempting maintenance themselves.
Replace Your Air Filter for Maximum Efficiency
The air filter represents the single most important component affecting furnace efficiency and longevity. A clogged filter forces your system to work harder, increases energy consumption, and allows dust to infiltrate sensitive mechanical components. Locate the filter compartment, typically found where the return duct connects to the furnace cabinet. Slide out the existing filter and note the direction of airflow arrows printed on the frame.
Examine the removed filter under good lighting. If you cannot see light passing through the media, or if visible dirt covers more than thirty percent of the surface, replacement is overdue. Most residential systems in Buda use filters with MERV ratings between 8 and 13, balancing filtration efficiency with airflow resistance. Higher MERV ratings capture smaller particles but may restrict airflow in older systems not designed for dense filter media. Consult your furnace manual or measure the existing filter dimensions to purchase the correct replacement size.
Install the new filter with arrows pointing toward the furnace, ensuring proper airflow direction. The filter should fit snugly without gaps around the edges that allow unfiltered air to bypass the media. In Central Texas homes, where dust from construction, agricultural activity, and dry weather conditions is prevalent, filters require replacement every 60 to 90 days rather than the standard 90-day interval recommended for moderate climates. Homes with pets, smokers, or allergy sufferers should inspect filters monthly and replace them as needed.
While the filter compartment is open, vacuum visible dust from the surrounding area using a soft brush attachment. Check the filter track or frame holder for damage that might prevent proper seating. A properly functioning filter system protects the blower motor, heat exchanger, and other expensive components from premature wear. This simple maintenance step alone can reduce heating costs by fifteen to twenty percent and extend equipment lifespan by several years.
Clean Blower Components and Inspect Electrical Safety
The blower assembly circulates heated air throughout your home, making it critical to system performance. With power still disconnected, locate the blower compartment, usually positioned below or beside the burner assembly. Remove the access panel and use a flashlight to inspect the blower wheel, also called a squirrel cage fan. Dust accumulation on the blades reduces airflow efficiency and creates noise during operation.
Use a shop vacuum with a brush attachment to remove loose debris from the blower wheel and surrounding housing. For stubborn buildup, carefully clean individual blades with a damp cloth, rotating the wheel manually to access all surfaces. Avoid applying excessive force that might bend the delicate fins or throw the wheel out of balance. A balanced blower wheel runs quietly and efficiently, while an unbalanced wheel vibrates, creates noise, and accelerates bearing wear.
After cleaning, inspect the blower motor for signs of overheating, such as discolored wiring or a burning smell. Check the motor mounting bolts to ensure they are secure. Loose mounting hardware allows excessive vibration that damages electrical connections and shortens motor life. Examine the drive belt if your system uses a belt-driven blower. The belt should show no cracks, glazing, or fraying. Press the center of the belt span; it should deflect approximately half an inch. Excessive slack or tightness indicates the need for adjustment or replacement.
Move to the electrical connections throughout the furnace. Visually inspect all wire connections at the control board, limit switches, and safety sensors. Look for loose terminals, corrosion, or discolored wires indicating overheating. Tighten any loose connections with appropriate tools, but do not overtighten small terminals that may crack. In Texas homes where temperature variations between seasons are substantial, thermal expansion and contraction can loosen electrical connections over time. If you encounter melted insulation, heavily corroded terminals, or burnt wiring, stop immediately and contact a licensed electrician or HVAC technician. These conditions indicate serious safety hazards that require professional repair.
Test Thermostat Accuracy and Verify System Response
Your thermostat serves as the command center for the entire heating system, making its accuracy vital to comfort and efficiency. Even a small calibration error forces the furnace to cycle improperly, wasting energy and creating inconsistent temperatures. Remove the thermostat cover to access the interior components. Use a soft brush or compressed air to remove dust from the sensor and mechanical parts. Dust buildup insulates the temperature sensor, causing false readings that trigger unnecessary heating cycles.
Check the thermostat level using a small bubble level placed on the base. An unlevel thermostat can affect mercury switch operation in older mechanical models. For digital thermostats, verify that the display shows accurate information and that batteries (if applicable) have sufficient charge. Weak batteries cause erratic behavior, system failures, and lost programming in programmable models. Replace batteries annually as preventive maintenance, regardless of remaining charge.
To test calibration, place an accurate thermometer next to the thermostat and wait fifteen minutes for both to stabilize. Compare the readings; they should match within one degree. Variation beyond this range indicates a calibration problem requiring professional adjustment or thermostat replacement. Texas weather patterns create unique thermostat challenges, with spring and fall bringing rapid temperature swings that stress older units. Modern programmable and smart thermostats adapt better to these conditions while reducing energy costs through optimized scheduling.
After completing all maintenance steps, restore power at the circuit breaker and thermostat. Set the thermostat to heat mode and raise the temperature setting above the current room temperature. Listen for the furnace to ignite, typically within thirty to sixty seconds. Stand near supply registers throughout the home and verify that warm air flows consistently. The air temperature at registers should measure fifteen to twenty-five degrees warmer than return air temperature. Lower temperature rises suggest burner problems, heat exchanger issues, or ductwork leaks requiring professional diagnosis. For homeowners who would rather trust this critical testing to trained technicians, Gomez Heating and Air Conditioning offers thorough system diagnostics and tune-up services throughout Buda and surrounding areas, ensuring your heating system operates safely and efficiently all season long.
Secure All Components and Monitor Initial Operation
Complete your maintenance by conducting a thorough final inspection of all furnace components. Replace all access panels and secure them with original fasteners. Loose or missing panels create air leaks that reduce efficiency, allow dust infiltration, and create safety hazards. Double-check that no tools, rags, or cleaning materials remain inside the furnace cabinet. Foreign objects left inside the unit can obstruct airflow, damage moving parts, or create fire hazards when the system operates.
Walk through your home and inspect all supply registers and return grilles. Remove vent covers and vacuum inside the ductwork as far as the vacuum hose reaches. Clear furniture, curtains, and storage items away from registers to ensure unobstructed airflow. Blocked vents force your furnace to work harder while leaving some rooms inadequately heated. In Buda homes, where open floor plans are common, proper register placement and airflow become especially important for even heat distribution.
Monitor the furnace through several complete heating cycles over the next few hours. Listen for unusual sounds such as grinding, squealing, or banging that might indicate problems missed during inspection. Watch for proper ignition sequences, steady flame patterns in gas furnaces, and consistent blower operation. Note how long the furnace runs before reaching the thermostat set point; unusually long run times suggest efficiency problems requiring professional attention.
Check the area around the furnace for any changes in temperature, unusual odors, or visible smoke. Gas furnaces should produce only a faint smell during the first few heating cycles as accumulated dust burns off the heat exchanger. Persistent odors, especially those resembling rotten eggs or sulfur, indicate gas leaks requiring immediate professional response and system shutdown. Create a maintenance log documenting the date, work performed, filter size installed, and any observations about system performance. This record helps track maintenance intervals and provides valuable diagnostic information if problems develop later. Schedule professional maintenance annually to address tasks beyond DIY capability, such as combustion analysis, heat exchanger inspection, and refrigerant system checks. Regular attention to these maintenance steps maximizes your heating system’s efficiency, reliability, and lifespan while keeping your Buda home comfortable throughout the cooler months.
