
Replace or Clean Your Furnace Filter
The furnace filter is the first line of defense against dust, allergens, and debris entering your heating system. A clogged or dirty filter forces your system to work harder, consuming more energy and driving up your heating bills. In Central Texas, where fluctuating temperatures between cool mornings and mild afternoons mean your system cycles frequently, filters can become dirty faster than you might expect.
Check your filter monthly during heating season. Disposable filters should be replaced every one to three months depending on usage, while reusable filters need thorough cleaning. Turn off your system at the thermostat before removing the filter. Hold it up to a light source; if you cannot see through it clearly, replacement is necessary. For homes with pets or in areas with higher dust levels common around new construction in the region, monthly replacement provides optimal performance and air quality.
Inspect and Clean Blower Components
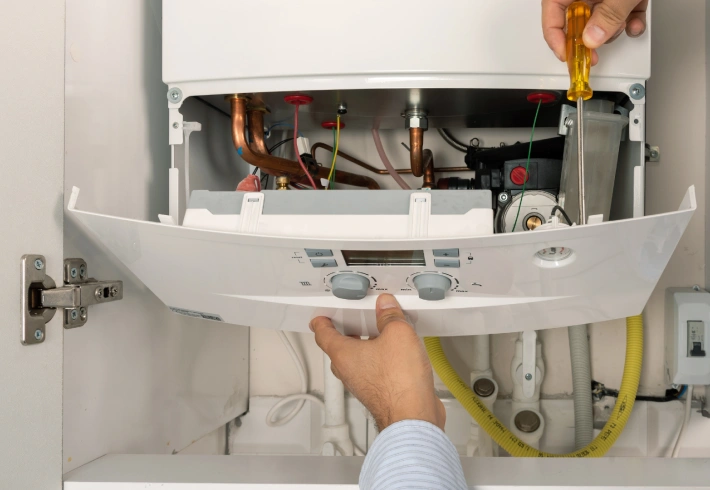
The blower assembly circulates warm air throughout your home, and accumulated dust on the blower wheel reduces airflow and system performance. Before beginning this step, turn off power to your system at both the thermostat and the circuit breaker for safety. Locate the blower compartment door, typically found on the front or side of your unit, and remove the access panel.
Using a soft brush or vacuum with a brush attachment, gently remove dust and debris from the blower wheel blades. Take care not to bend the blades or damage the motor. Inspect the blower motor for dust accumulation and clean around it carefully. If your motor has oil ports (many newer models are sealed and maintenance-free), add two to three drops of non-detergent motor oil. This simple maintenance task restores proper airflow and can reduce operating noise while improving heat distribution to all rooms in your home.
Check and Adjust Thermostat Settings
Your thermostat controls when and how long your heating system operates, making it essential for both comfort and cost control. Start by verifying that your thermostat is level on the wall, as even a slight tilt can affect the internal mechanisms in mechanical models. Check that it is located away from heat sources, drafts, direct sunlight, or doorways that could cause false readings and unnecessary cycling.
If you have a programmable or smart thermostat, review your temperature schedule to match your actual routine. Setting the temperature back seven to ten degrees for eight hours daily can save up to ten percent annually on heating costs. For occupied periods, setting your thermostat between 68 and 70 degrees provides comfort while managing energy use. Replace batteries in battery-powered thermostats annually, preferably at the start of heating season, to prevent unexpected failures during cold snaps. Consider financing options if upgrading to a smart thermostat that learns your preferences and adjusts automatically for maximum savings.
Examine and Clear Vents and Registers
Blocked or closed vents force your system to work harder and create uneven heating throughout your home. Walk through each room and ensure all supply vents (where warm air enters) and return vents (where air is drawn back to the system) are open and unobstructed. Furniture, curtains, rugs, and storage items commonly block vents, restricting airflow and reducing system performance.
Remove vent covers and vacuum inside the ductwork as far as you can safely reach using a vacuum hose attachment. Wash register covers with warm, soapy water to remove dust buildup that restricts air movement. While all vents should remain open for proper system balance, you can slightly adjust airflow by partially closing vents in rooms you use less frequently. However, closing more than ten to fifteen percent of your vents can cause pressure imbalances that damage your system. If certain rooms consistently remain too warm or too cold, this indicates a ductwork or system balance issue that professional service can address.
Inspect Flue Pipe and Ensure Proper Ventilation
For gas heating systems, the flue pipe safely vents combustion gases outside your home. Inspect the visible portions of the flue pipe for signs of rust, corrosion, gaps, or disconnections. All joints should be secure with no visible separation. Look for black soot stains around connections, which indicate a potential exhaust leak that requires immediate professional attention.
Check that the flue pipe maintains proper upward slope toward the exterior vent and has no sagging sections where condensation could collect. Examine the exterior vent termination point to verify nothing blocks the opening, including bird nests, leaves, or other debris. While mild winters are typical in the area, occasional freezing temperatures can cause condensation issues in flue pipes. If you notice water staining, unusual odors, or have any concerns about your venting system, contact a qualified technician immediately. Combustion gas leaks pose serious health and safety risks that should never be addressed through DIY attempts. Our team provides thorough service agreements that include annual safety inspections of all venting components.
